Getting started
This is how you get from an empty screen to your first channel. The order matches the first launch of the app.
1. First-launch notice: player, not a provider
On the very first launch, Neverlag shows a notice that you confirm with “Understood”:
Neverlag is a player, not a provider. Neverlag does not supply, host or sell any content. This app only plays content that you provide yourself — via your own M3U playlist or the credentials of an IPTV provider.
Plus three points: Neverlag has no connection to any content providers; streaming copyrighted content without authorisation is not supported; you alone are responsible for the sources you use. You can read the notice again later under Settings → About Neverlag → “Player, not a provider — the notice”.
2. Choose your language
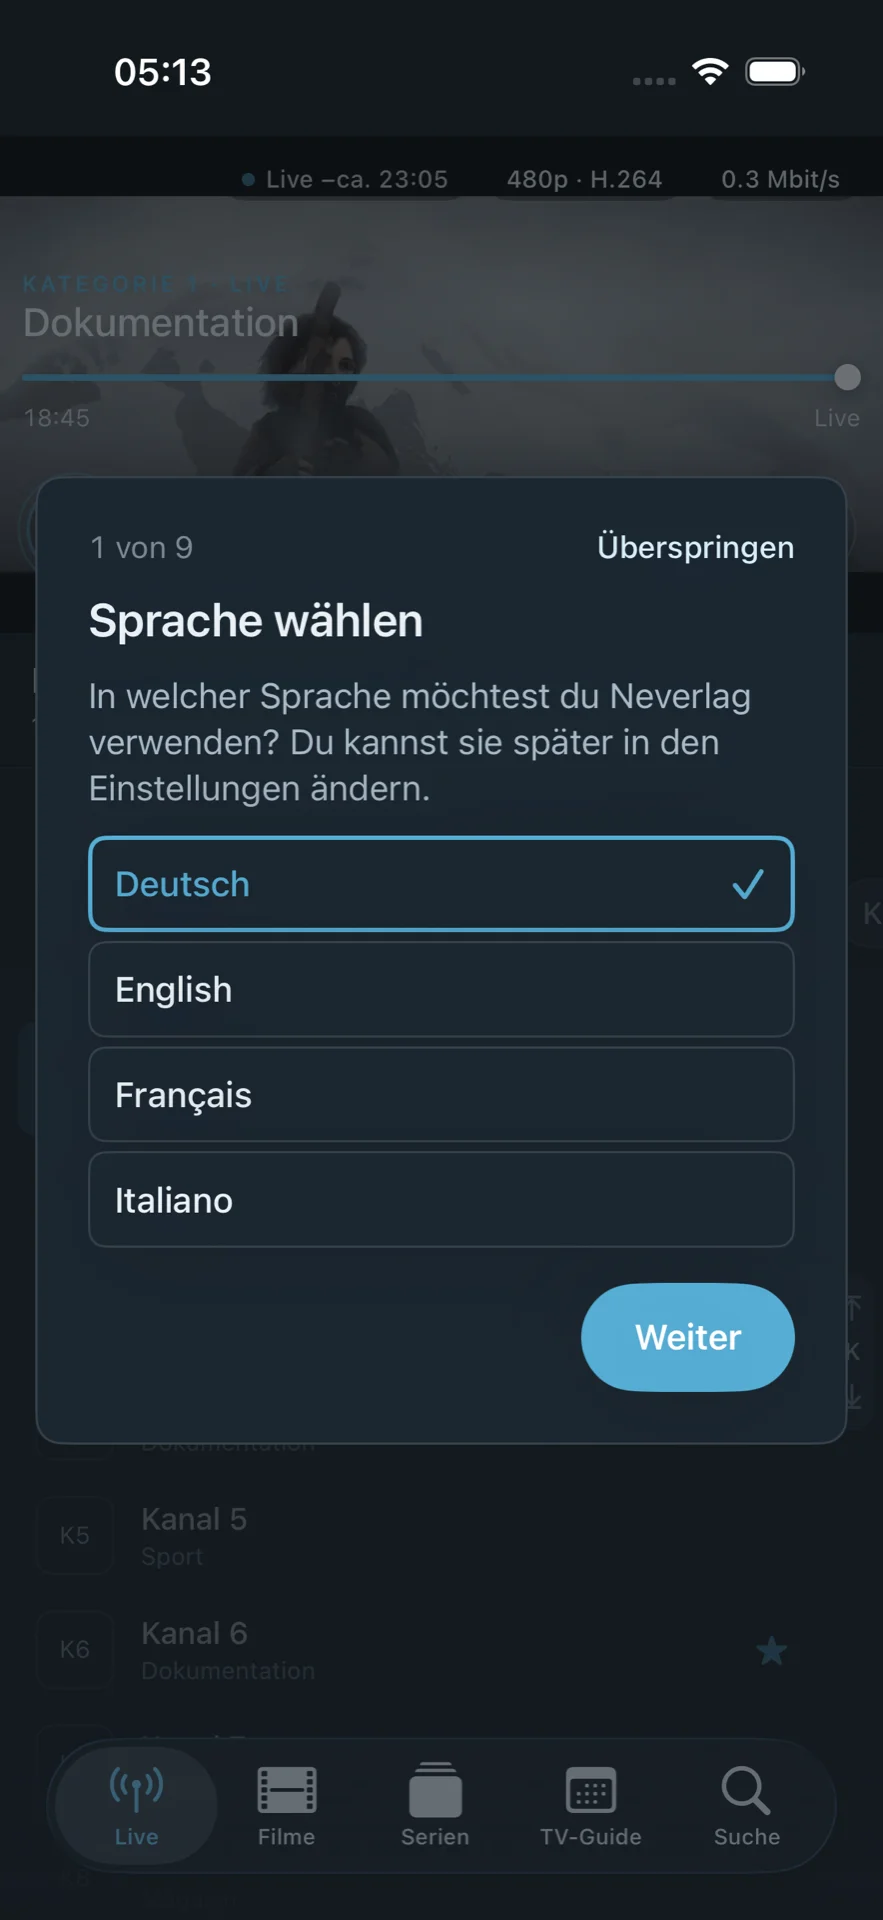
The first page of the start tour asks: “Which language would you like to use Neverlag in?” The choices are Deutsch, English, Français and Italiano. Neverlag suggests your device’s language; if none matches, English is preselected. The choice takes effect immediately, without a restart. You can change it at any time under Settings → Language.
3. The start tour
After the language, a short tour walks you through the six most important places in the app. Each page dims the screen and leaves the real control visible:
- Choose your language
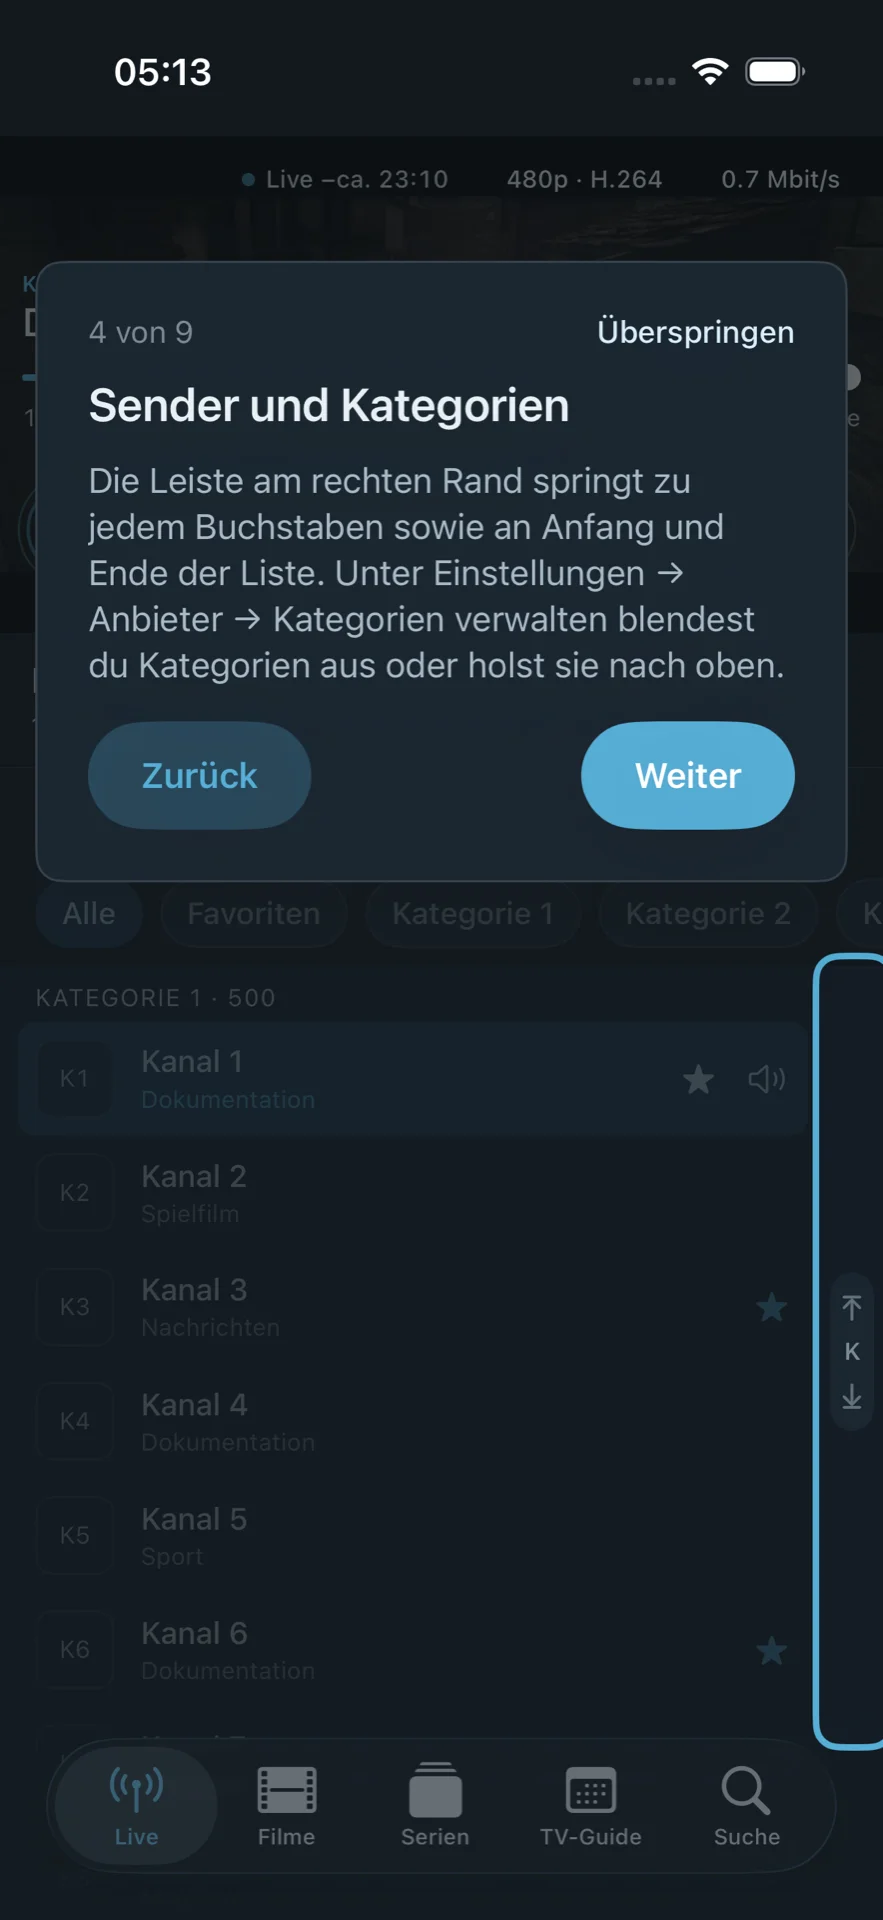
- Channel list and categories – “Tap a channel to play it. The A–Z bar on the right jumps straight to any letter.”
- Search – finds channels, programmes, movies and series.
- Favorites – press and hold a channel (iPhone/iPad), right-click (Mac) or press and hold the select button (Apple TV) and choose “Add to favorites”.
- TV Guide – shows what is on now and what is coming next; needs programme data (EPG) from your list.
- Settings – lists, playback, language, parental controls. When you open it for the first time, short hints explain each area.
The tour ends with “Let’s go” or “Set up now” if there is no list yet. “Skip” is available on every page. The tour appears once per device; under Settings → About Neverlag → “Tour of the app” you can repeat it at any time. On the Mac you control it with Enter, ←, → and Esc; on the Apple TV the focus is on “Next”, MENU goes back.
4. Welcome: choose a source
Without a list of your own, Neverlag shows the welcome screen:
Neverlag is a player and does not supply any content — you need your own M3U playlist or the credentials of your IPTV provider.
Three ways:
- Xtream account – “Server, username, and password”.
- M3U playlist – “Enter your playlist address”.
- Try demo mode – 30 demo channels with freely licensed clips, with no provider at all. Demo mode always remains free to use.
Note on the subscription: a subscription is required to set up your own sources. Before the first source of your own, the app shows the subscription screen with the trial and the offers. What the app displays there is described under Subscription and backup.
5. Set up an Xtream account
- Settings → Provider → “Add Xtream account …” (or straight from the welcome screen).
- Enter the server address, for example
http://server.beispiel:8080, plus username and password. “The details from your IPTV provider’s subscription. The password is stored exclusively in the Keychain.” - Connect. Neverlag checks the account and shows “Access active” or “Active until …”.
- Choose groups (see step 7).
- Import: “Loading channel list … ”, “Loading movies …”, “Loading series …”, then “List set up”.
Typical error messages and what they mean:
| Message | Meaning |
|---|---|
| “Sign-in failed — please check username and password.” | The credentials are wrong. |
| “Your access with this provider has expired.” | The provider reports an expired account. The date comes from the provider, not from Neverlag. |
| “The server is unreachable (…).” | Wrong address, server down, or no network. |
| “The server responded unexpectedly — is it really an Xtream panel?” | The address does not point to an Xtream interface. |
If the import is interrupted, what was imported so far is kept: “Connect” resumes from the last complete category.
6. Set up an M3U playlist
- Settings → Provider → “Add M3U playlist …”.
- Enter the address, for example
http://server.beispiel/playlist.m3u. If the playlist contains an EPG source (url-tvg), Neverlag picks it up automatically (“EPG source detected”). - Load playlist. Neverlag reads the file and counts the groups.
- Choose groups, then import.
Neverlag skips broken lines and tells you how many (for example “malformed EXTINF line”, “invalid URL”). If the app reports “No channels found — is this really an M3U playlist?”, the address points to something other than a playlist.
7. Choose groups
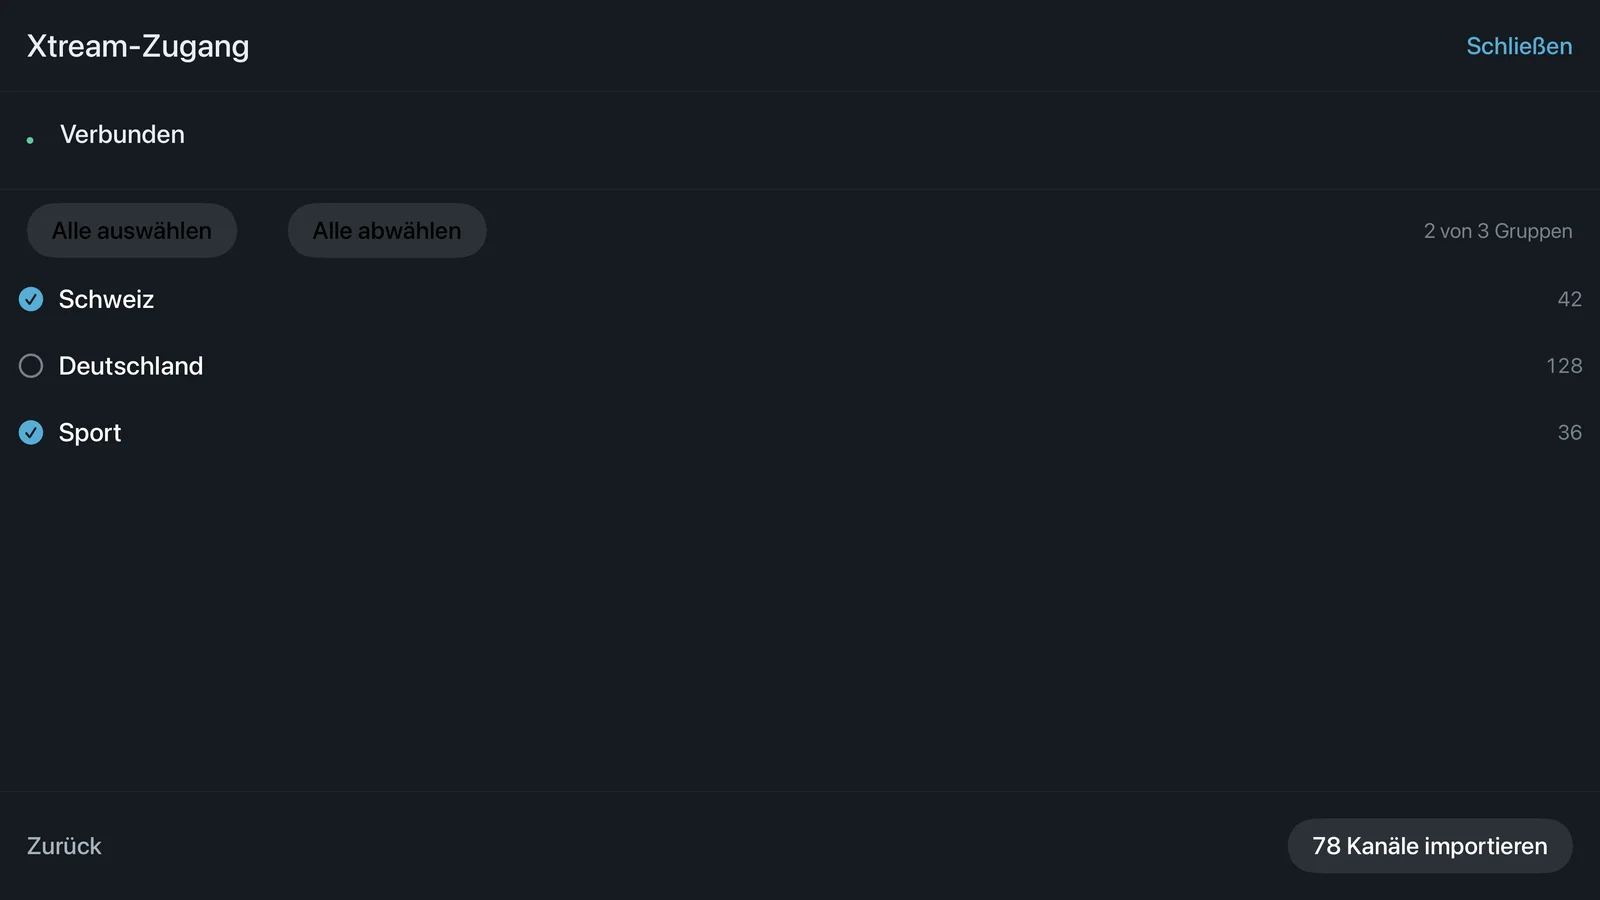
Many providers carry hundreds of groups (countries, sport, movies, series). During setup you choose which groups Neverlag imports: tabs “Live”, “Movies”, “Series”, plus “Select all” and “Deselect all”. Fewer groups means a faster import, a shorter channel list and less storage. Later you change the selection under Settings → Provider → “Manage groups & reload …”.
8. Transferring from the iPhone or Mac to the Apple TV (pairing)
You don’t have to type anything on the Apple TV. Here is how:
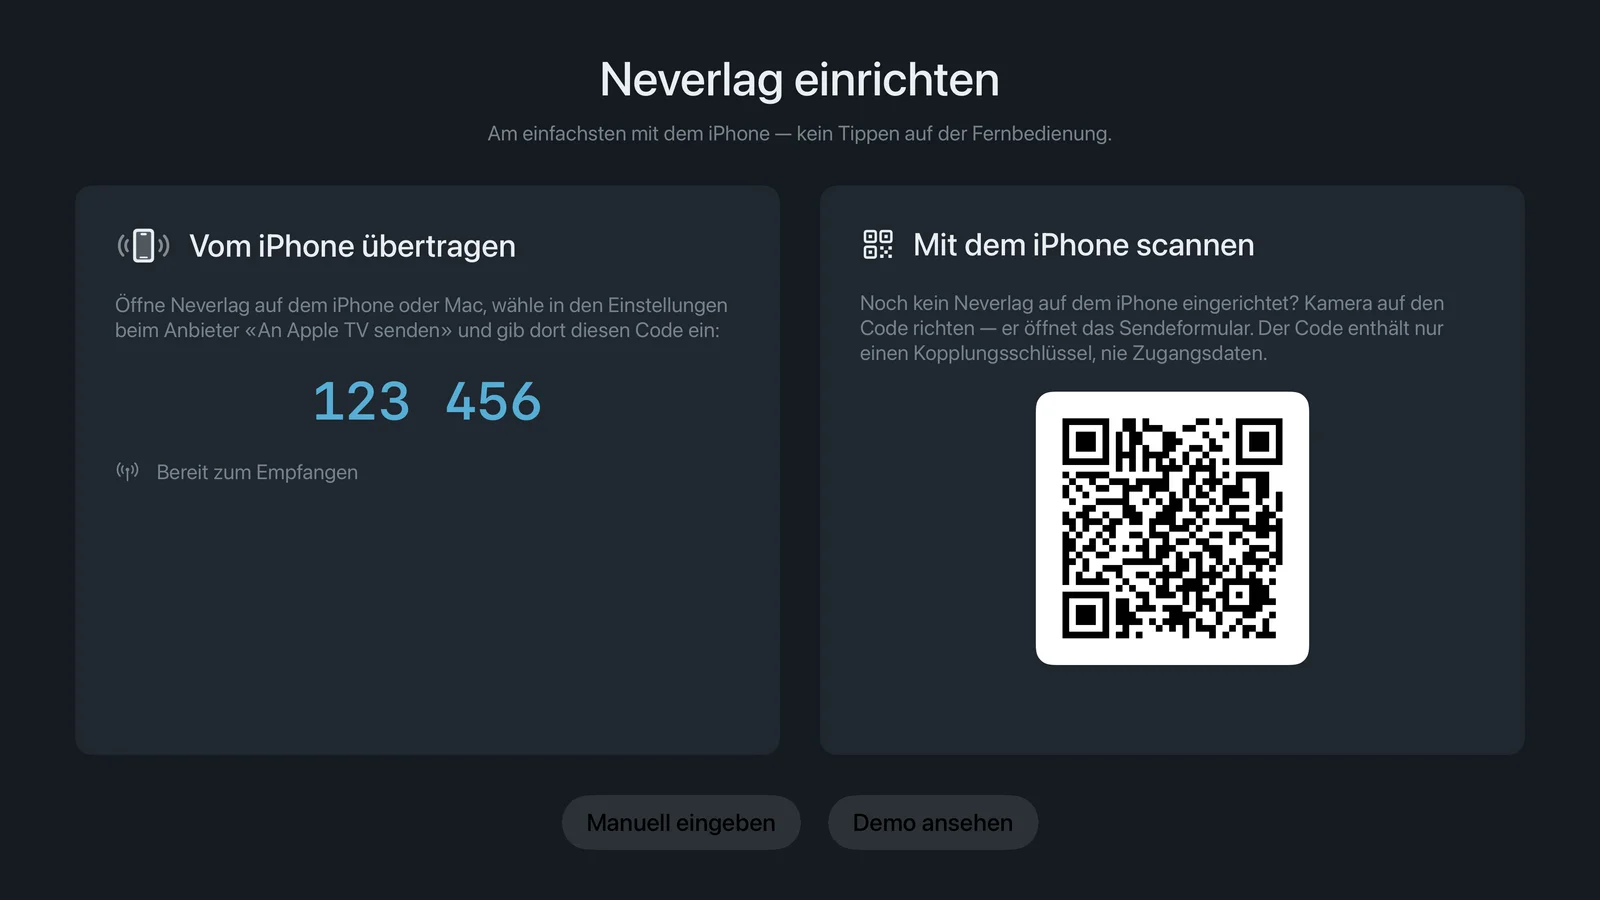
- Open Neverlag on the Apple TV. The setup screen “Set up Neverlag” shows “Transfer from iPhone” with a six-digit code and a QR code.
- On the iPhone, iPad or Mac where your credentials already are: Settings → Provider → “Send to Apple TV …”. Choose the provider, search for the Apple TV on your home network (“Search”) and enter the code from the TV. On the iPhone/iPad you can also use “Send to Apple TV (scan QR code) …” – point the camera at the QR code.
- Optionally “Include favorites and positions”.
- Confirm on the Apple TV: “Set up provider ‹…›? The credentials stay on this Apple TV.” The catalogue import then runs there.
The transfer is encrypted and runs directly between the devices on your home network. If there is no local connection, iCloud takes over automatically – end-to-end encrypted, and the mailbox is deleted after the transfer. The QR code contains only a pairing key, never credentials.
Common messages:
- “No local connection to the Apple TV and no iCloud account …” – put both devices on the same network or sign in to iCloud on both.
- “Connection rejected — check the code. The TV now shows a new code.” – use the code currently displayed.
- “The Apple TV has an older Neverlag version — please update there.”
The same route later also transfers the network storage for recordings (Settings → Recordings → “Send to Apple TV …”).
9. Hints in context
When you open an area for the first time, short hints appear right next to the buttons (for example “Jump bar”, “Loading ring and hint line”, “Quality”). With “?” you can see them again at any time; “Don’t show again” hides them. Switch on and off: Settings → About Neverlag → “Show hints”.
Next
- Interface – channel list, search, player controls per device.
- Settings → Provider – everything about sources, groups, categories and backup.